Local Network SSL / Https on Chrome without Certificate Errors


If you've ever hosted a private web service on your local network , you've ran into the pain point of chrome or any other browser complaining that the connection is not secure or that the certificate is not valid.
To resolve this, there are three key components you need:
-
A Domain and SSL Certificate: Having a domain and a wildcard SSL certificate is required.
-
A Local Reverse Proxy Host: You'll also need a reverse proxy host running on your local network. This host acts as an intermediary, managing incoming requests and directing them to the appropriate local web service.
-
Setting A Records in DNS: Finally, you need to configure A records in your domain's DNS settings to point to the local IP address of your reverse proxy host. By doing this, you ensure that the public DNS record only functions within your private network.
By following these steps, you'll have a secure and private local network setup that allows your web service to function seamlessly, without encountering those pesky security warnings in Chrome or other browsers.
Obtaining Free Wildcard SSL Certificates with NGINX Proxy Manager
Wildcard SSL certificates are often costly, and free certificates can be inconvenient due to their short three-month lifespan. However, with NGINX, you can automate the renewal of your certificates, making the process much more convenient.
 NginxProxyManager
Setting everything up in Kubernetes
Next I'll show you how to set all of this up using the following:
- Kubernetes manifests
- CloudFlare DNS
- NGINX Proxy Manager
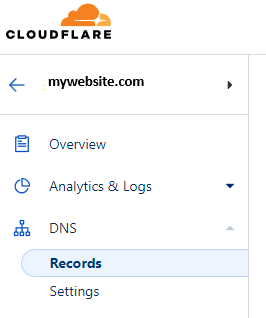
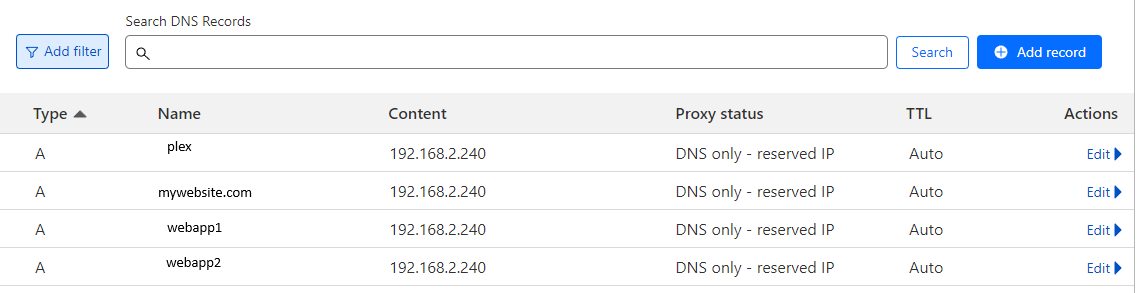
Setup DNS Records
Go to your DNS management, I'm using CloudFlare, and add A records for the root and any domain you might wants. Note that the IP address is going to be your private local network IP address, not a public IP address.
Create an DNS API Token
To enable NGINX to automatically validate your domain, you'll need to create an API token. Follow these steps for Cloudflare:
Open the Cloudflare dashboard using the following link: Cloudflare dashboardOpen
For more detailed information on creating an API token, you can refer to Cloudflare's official documentation, available at https://developers.cloudflare.com/fundamentals/api/get-started/create-token/
NGINX Kubernetes Manifest
To get NGINX up and running, you have the option to use either Kubernetes or Docker. Instructions for installing NGINX with Docker can be found on the NGINX GitHub page, linked above.
Apply the following Kubernetes manifest files to configure NGINX. Keep in mind that you'll need to configure the IP addresses according to your specific requirements.
NGINX load balancer
apiVersion: v1
kind: Service
metadata:
  name: nginx-lb
spec:
  selector:
    app: nginx-app
  ports:
    - name: http
      protocol: TCP
      port: 80
      targetPort: 80
    - name: https
      protocol: TCP
      port: 443
      targetPort: 443
    - name: manage
      protocol: TCP
      port: 81
      targetPort: 81
  type: LoadBalancer
  loadBalancerIP: 192.168.2.240
NGINX App
Setup NGINX Proxy
To set up an Nginx proxy, first log in to your Nginx instance. You can do this by navigating to the IP address you configured within Docker or Kubernetes. In my case, the IP address is 192.168.2.240. Please note that the default login credentials are [email protected] / changeme.
Accessing SSL Certificates
- Once you're logged in, navigate to the SSL Certificates section.
- In the top-right corner, click on "Add SSL Certificate," and choose "Lets Encrypt."
- In the Domain Names section, add the domain you want to use for your local setup. For instance, you can use *.mywebsite.com and mywebsite.com.
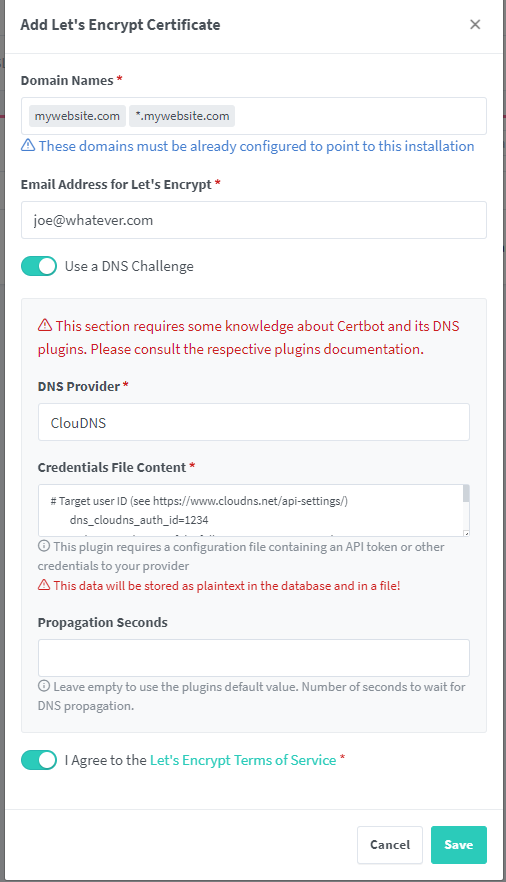
- Enable the DNS Provider option to automate the entire certificate issuance process.
- Choose your DNS Provider from the list. For example, if you're using Cloudflare, refer to an earlier section of this guide where I explained how to create an API Token for Cloudflare. Insert this token into the designated text area.
- Click on "Save" to confirm your settings.
After a few moments, you should receive a success message. If you encounter any issues, consider adjusting the "Propagation Seconds" option, as errors may occur if the validation process is initiated too quickly.
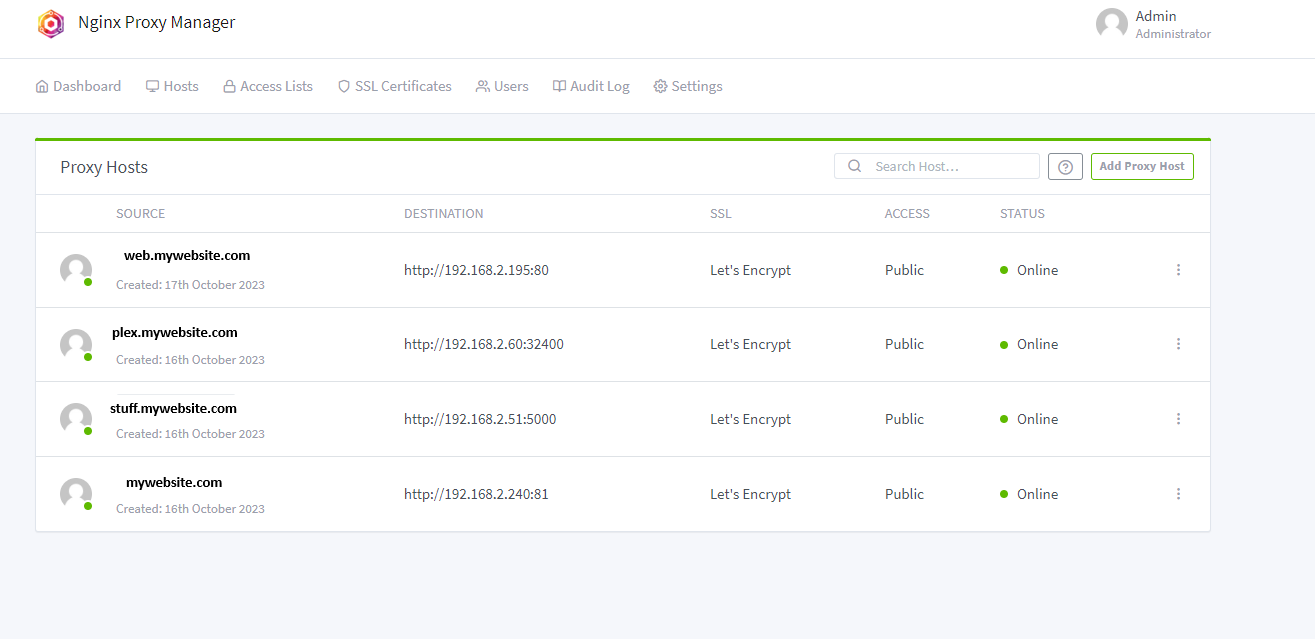
Add Proxy hosts
To map subdomains to your local network, follow these steps:
- Navigate to the "Hosts" section and click on the "Proxy Host" option.
- Click on "Add Proxy Host."
- Fill in the required options. Be sure to select the certificate that was created earlier in the SSL Section.
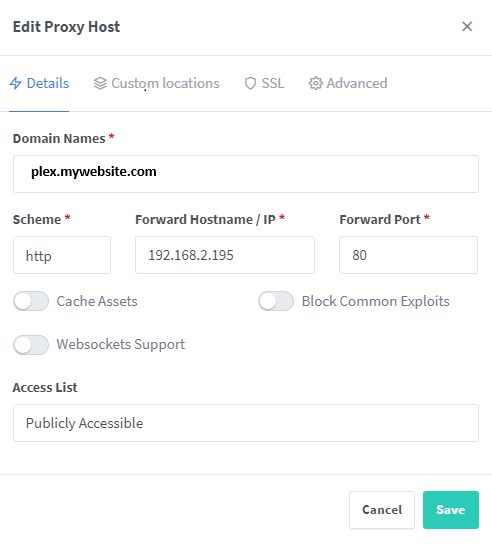
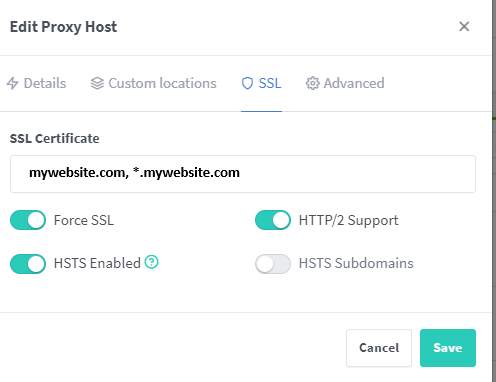
You can now add multiple subdomains as needed.
Conclusion
If you have successfully followed all the steps provided above, you should now have the ability to access private local network devices via your chosen domain without encountering certificate validity errors.