Setup a K3s Cluster running on a Atomic Pi


Intro
In this post, I'll walk through the steps needed to install K3s on an Atomic Pi, a low-cost and low-power single-board computer.
If you're a developer looking to test out a new application or a system administrator looking to learn more about Kubernetes, this post will provide the information you might need to get started.
As an example on how Containers work with K3s , I'll show you how to install an app called uptime kuma
Ubuntu
Download ubuntu (22.04.1 LTS) https://ubuntu.com/download/server
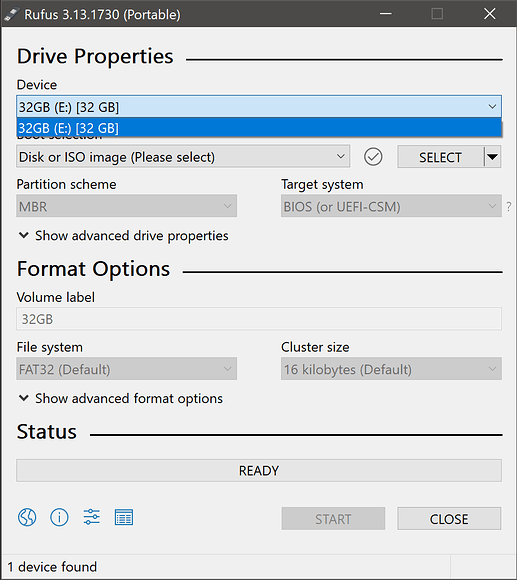
Create a bootable USB (windows)
I recommend using https://rufus.ie/en/ on windows.
- Open Rufus and select your flash drive from the "Device" drop-down menu.
- Insert your USB stick
- In the "Boot selection" section, click the "Select" button and choose the Ubuntu ISO file you downloaded.
- Click the "Start" button to begin the process of creating the bootable flash drive.
Check out this article for more details.
https://ubuntu.com/tutorials/create-a-usb-stick-on-windows#1-overview
Install unbuntu on all your Atomic pis
Steps:
- Insert the flash drive into the Atomic Pi and power it on.
- Press the "Del" key to enter the BIOS settings.
- Change the boot order to prioritize the flash drive.
- Save the changes and exit the BIOS.
- The system will boot from the flash drive and start the Ubuntu installer.
- Follow the on-screen instructions to complete the installation process.
- Make sure to turn ssh on!
Note: It's recommended to backup any important data on the Atomic Pi before installing Ubuntu, as the installation process will erase all existing data.
Install Nodes
Master Node Time
Connect use SSH
Connect to your master node
ssh [email protected]
Configure some environment variables
Disable servicelib and traefik, we are going to use MetalLb.
ServiceLB is a Kubernetes service that provides load balancing for Kubernetes services. It is built on top of the Kubernetes service abstraction, and is designed to provide simple and consistent load balancing across different Kubernetes environments.
export K3S_KUBECONFIG_MODE="644"
export INSTALL_K3S_EXEC=" --disable servicelb --disable traefik"
Install K3s
curl -sfL https://get.k3s.io | sh -
Uninstall (only if needed)
If you ever need to uninstall , use the script below.
/usr/local/bin/k3s-uninstall.sh
Check the status
sudo systemctl status k3s
Get The Access Token
Workers need an auth token , you can get it with the command below.
sudo cat /var/lib/rancher/k3s/server/node-token
Worker Node Time
Configure some environment variables
export K3S_KUBECONFIG_MODE="644"
export K3S_URL="https://192.168.1.101:6443"
export K3S_TOKEN="Put the Master node token here!!"
Install K3s
curl -sfL https://get.k3s.io | sh -
Uninstall (only if needed)
If you ever need to uninstall , use the script below.
/usr/local/bin/k3s-agent-uninstall.sh
Check the status
sudo systemctl status k3s-agent
Checking on everything
Use the command below to get the status of everything
kubectl get all -o wide
More commands here https://kubernetes.io/docs/reference/kubectl/
Setup Local WorkStation Kubectl
I find it easier to apply manifests locally rather than through ssh.
Here are steps on how you can control your cluster with your local machine.
Get The tools
Get the tools here
https://kubernetes.io/docs/tasks/tools/
Copy config
copy the kube config from your master node to your local machine
scp [email protected]:/etc/rancher/k3s/k3s.yaml ~/.kube/config
Replace The ip
Open that configuration File(~/.kube/config or C:\users\myuser.kube\config) and replace 127.0.0.1 with your master node ip (192.168.1.100)
After that you should be able to run Kubectl commands from your local machine.
Verify with
kubectl get all -o wide
Install Metal Lb
MetalLb is mainly used because kubernetes doesn't provide a network loadbalancer for bare-metal clusters . MetalLb will hand out addresses to load balancer services that need an local network ip.
Install
kubectl apply -f https://raw.githubusercontent.com/metallb/metallb/v0.13.7/config/manifests/metallb-native.yaml
- Create a folder for your kubernetes project
- Create a yaml file called metallb-layer.yaml
apiVersion: metallb.io/v1beta1
kind: IPAddressPool
metadata:
  name: main-pool
  namespace: metallb-system
spec:
  addresses:
    - 192.168.1.200-192.168.1.215
  autoAssign: true
---
apiVersion: metallb.io/v1beta1
kind: L2Advertisement
metadata:
  name: main-ad
  namespace: metallb-system
spec:
  ipAddressPools:
    - main-pool
- Open a terminal in the same directory
- run command below to apply all configurations
kubectl apply -f ./
Install Uptime Kuma Configurations
- Create a folder for your uptime kuma
- Create a yaml file called uptime-kuma-loadbalancer.yaml
- Create a yaml file uptime-kuma-pvc.yaml
- Create a yaml file uptime-kuma.yaml
Edit the uptime-kuma-loadbalancer configuration yaml file and use the following
apiVersion: v1
kind: Service
metadata:
  name: uptime-lb
spec:
  selector:
    app: uptime-kuma
  ports:
    - port: 3001
      targetPort: 3001
  type: LoadBalancer
  loadBalancerIP: 192.168.2.210
Edit the uptime-kuma-pvc configuration yaml file and use the following
apiVersion: v1
kind: PersistentVolumeClaim
metadata:
  name: uptime-kuma-pvc
spec:
  accessModes:
    - ReadWriteOnce
  resources:
    requests:
      storage: 1Gi
Edit the uptime-kuma configuration yaml file and use the following
apiVersion: apps/v1
kind: Deployment
metadata:
  name: uptime-kuma
  labels:
    app: uptime-kuma
spec:
  replicas: 1
  selector:
    matchLabels:
      app: uptime-kuma
  template:
    metadata:
      labels:
        app: uptime-kuma
    spec:
      containers:
        - name: uptime-kuma
          image: louislam/uptime-kuma:latest
          ports:
            - containerPort: 3001
          volumeMounts:
            - name: kuma-volume
              mountPath: /app/data
      volumes:
        - name: kuma-volume
          persistentVolumeClaim:
            claimName: uptime-kuma-pvc
- Open a terminal in the same directory
- run command below to apply all configurations
kubectl apply -f ./